How to Use Grid Maker for Drawing: A Step-by-Step Guide
Learn how to use the grid method with Grid Maker to accurately reproduce any reference image onto paper, perfect for beginners and experienced artists alike.
The grid method is one of the most reliable techniques for accurately transferring a reference image onto paper. With Grid Maker, the entire process becomes effortless — just upload your image, customize the grid, and export a ready-to-use reference sheet.
Here's how I use it in my daily drawing practice.
Step 1: Choose Your Reference Image
Start by finding an image you'd like to draw. It can be anything — a photograph, an illustration, or a character design. The key is to pick something with clear shapes and contrast that will translate well to a sketch.

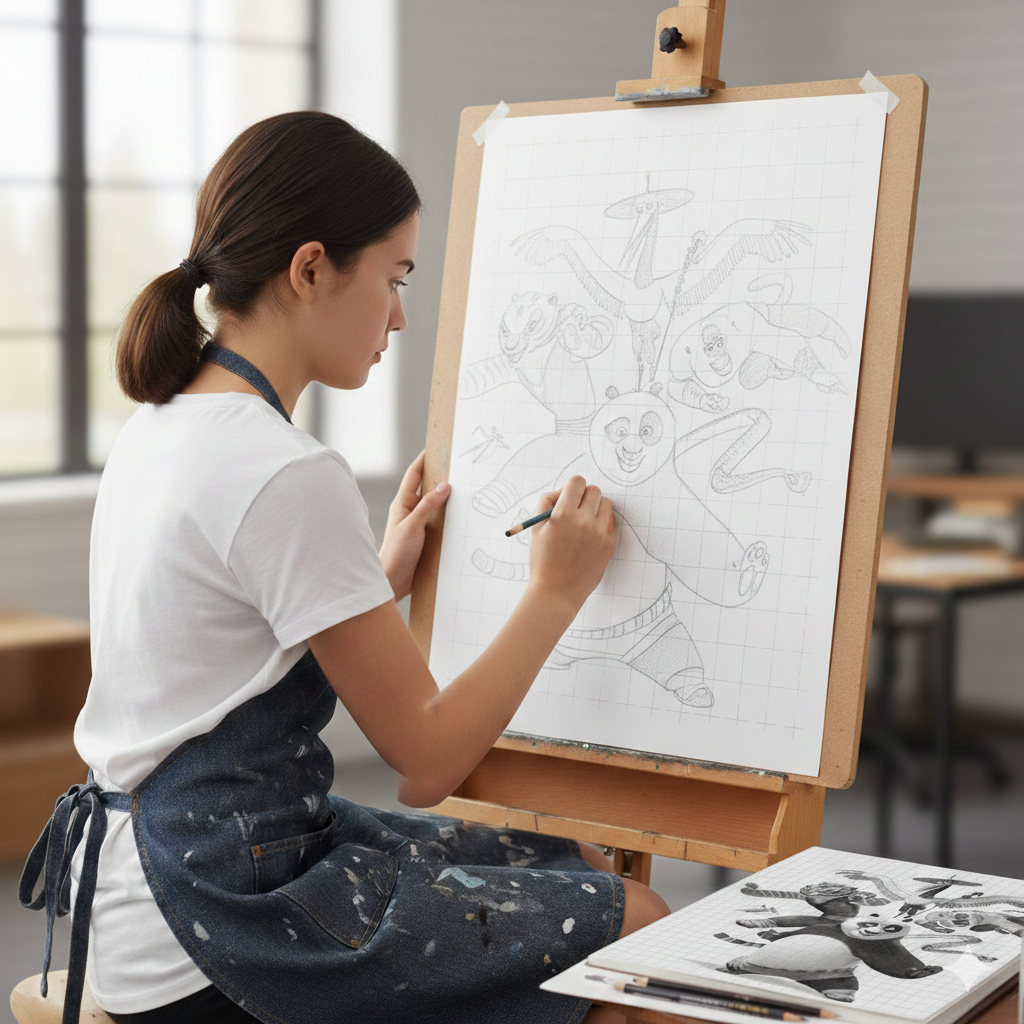
For this example, I'm using a colorful character illustration with dynamic poses — a great subject for practicing proportions and gesture.
Step 2: Generate a Grid Reference with Grid Maker
Head over to Grid Maker and upload your reference image. Here's what to configure:
- Grid size: Set the number of rows and columns. More cells mean higher accuracy, but also more work. I typically use 10×10 for detailed pieces and 5×5 for quick studies.
- Grayscale mode: Turn this on. It strips away color distractions and lets you focus purely on values and shapes — essential for pencil sketching.
- Diagonal lines: Enable these for extra guidance within each cell. They help you pinpoint where key lines and edges cross within each grid square.
- Export settings: Choose your paper size (A4, A3, or custom) and resolution multiplier for print-quality output.

The result is a clean, grayscale grid overlay on your image. Each cell becomes a small, manageable area to focus on — instead of tackling the whole image at once, you only need to reproduce what's inside one square at a time.
Step 3: Draw Along with the Grid
Print out your grid reference (or display it on a tablet beside you). On your drawing paper or canvas, lightly sketch the same grid with a pencil and ruler.
Now, work through the grid cell by cell:
- Look at what's inside a cell on the reference
- Reproduce those lines and shapes in the corresponding cell on your paper
- Move to the next cell and repeat
This approach breaks a complex image into small, manageable pieces. You stop worrying about "getting the whole thing right" and instead focus on one tiny area at a time. It's surprisingly relaxing and effective.
Tips for this stage:
- Start from the top-left and work systematically
- Focus on the major shapes first, then add details
- Use the diagonal lines as additional reference points
- Keep your grid lines light so they're easy to erase later
Step 4: Complete Your Artwork
Once you've transferred all the key lines and shapes, gently erase the grid lines from your drawing. Then refine your sketch — add shading, clean up edges, and bring the piece to life.

The grid method preserves accurate proportions while letting your own artistic style shine through in the final rendering.
Why Grid Maker Works
Traditional grid drawing requires you to manually overlay a grid on your reference image using image editing software — a tedious process. Grid Maker automates this entirely:
- One-click grid overlay with customizable rows, columns, and line styles
- Built-in grayscale conversion optimized for sketching
- Diagonal guide lines for more precise cell-by-cell reference
- Print-ready export at any paper size and resolution
- Square cells guaranteed — no distortion regardless of paper dimensions
Whether you're a beginner learning proportions or an experienced artist working on a commission, the grid method with Grid Maker gives you a reliable foundation for accurate, confident drawing.
Give it a try with your favorite reference image — you might be surprised how much it improves your results.